tailwind css 똑똑하게 사용하기

Code Editor 설정
Tailwind CSS IntelliSense 익스텐션

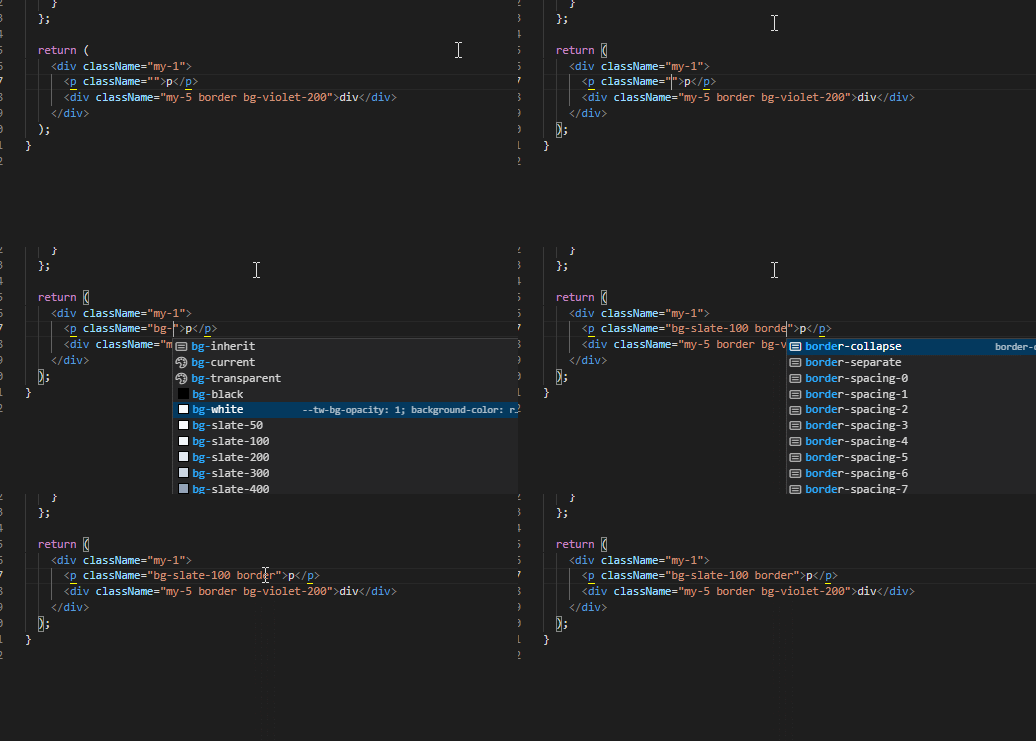
테일윈드 공식 익스텐션을 사용하면 자동 완성, 해당 클래스명 hover 시 속성 확인, 린팅 등의 기능을 제공하여 좀 더 편리하게 코드를 작성할 수 있습니다.
Prettier 플러그인

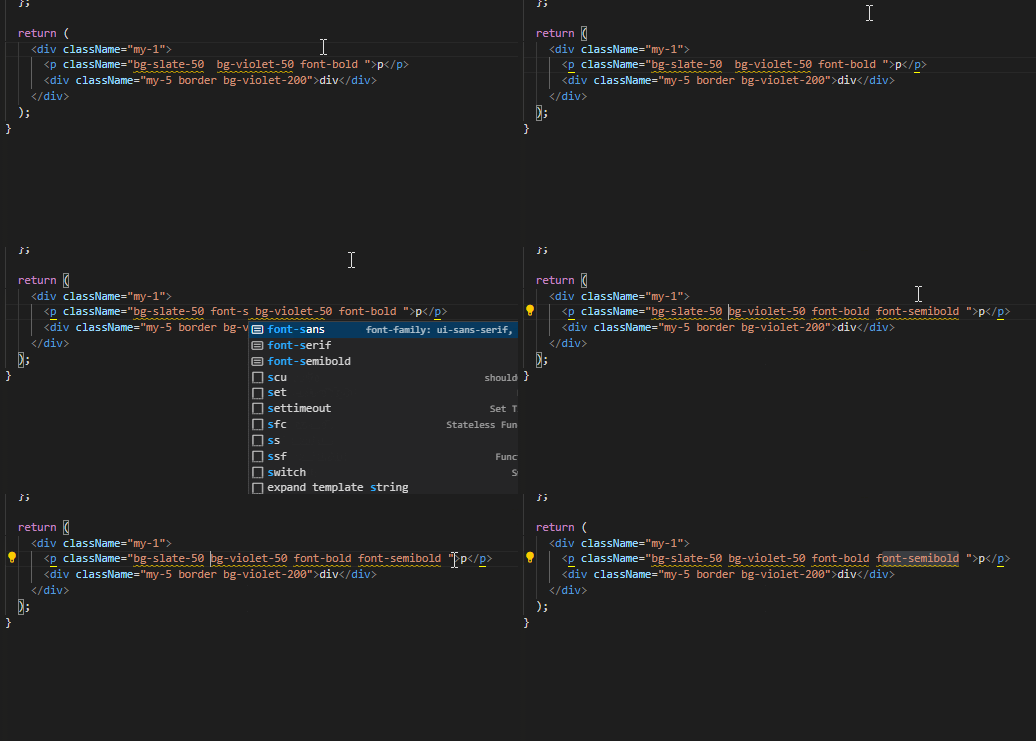
테일윈드 공식 prettier 플러그인을 사용하면 권장 순서에 따라 클래스를 자동 정렬할 수 있습니다.
npm install -D prettier-plugin-tailwindcss
// .prettierrc.json
{
  // 생략
  "plugins": ["prettier-plugin-tailwindcss"]
}
Custom Styles
커스텀 테마
테일윈드는 다양한 색상과 사이즈(px)를 지원하고 있습니다. 하지만 프로젝트를 진행하다 보면 해당 컨셉에 맞는 디자인 가이드가 정해져 여러 컴포넌트에서 필요한 경우가 있는데요. 이럴 때 tailwind.config.js의 theme에 추가하여 사용할 수 있습니다. theme.extend.colors가 아닌 theme.colors에 추가하게 되면 기존 색상을 덮어쓰게 됩니다.
/** @type {import('tailwindcss').Config} */
module.exports = {
  theme: {
    extend: {
      colors: {
        primary: '#ffc107',
        secondary: '#2979ff',
        success: '00c07f',
        failure: 'ff6562',
      },
      fontSize: {
        '15px': '15px',
      },
    },
  },
};<button type="button" className="bg-primary text-15px rounded-md">
로그인
</button>임의의 값 사용
만약 한 번 사용하는 px 또는 색상이 있는데 해당 클래스를 테일윈드에서 지원하지 않는다면 아래와 같이 임의의 값을 넣어 사용할 수 있습니다.
<button type="button" className="rounded-[50px] bg-[#702ddc] text-[15px]">
  로그인
</button>
@layer
버튼의 경우 여러 컴포넌트에 같은 스타일이 사용될 가능성이 매우 높은데요. 중복을 줄이기 위해선 사용자 정의 CSS를 추가하여 해당 스타일을 재사용할 수 있습니다.
/* main.css */
@tailwind base;
@tailwind components;
@tailwind utilities;

.btn {
  background-color: red;
  color: #fff;
  padding: 10px;
}<button className="btn" type="button">
button
</button>또는 아래와 같이 @layer 문을 사용하여 tailwind Base, components, utilities 레이어에 스타일을 추가할 수도 있습니다.
/* main.css */
@tailwind base;
@tailwind components;
@tailwind utilities;

@layer components {
  .btn {
    background-color: red;
    color: #fff;
    padding: 10px;
  }
}
테일윈드가 스타일을 3개의 layer로 구성하는 이유
css 스타일이 중복될 때 스타일시트 안에서 마지막에 선언된 클래스의 스타일이 적용됩니다.
.btn-black {
  color: red;
  background-color: black;
}

.btn-blue {
  background-color: blue;
}

.btn {
  background-color: yellow;
}<button className="btn-black btn-blue btn" type="button">
button
</button>위 코드에서 버튼의 배경색이 선언된 클래스 3개를 추가했습니다. 이 버튼의 배경색은 스타일시트 내 가장 마지막에 선언된 .btn의 색상(노랑)이 적용되며 폰트 색상은 중복되지 않으므로 빨간색이 적용됩니다. 이런 경우를 관리하기 위해 테일윈드는 3개의 레이어로 구분합니다.
base레이어는 리셋 규칙이나 HTML 요소 기본 스타일을 위한 레이어입니다.components레이어는 유틸리티로 재정의할 수 있는 클래스 기반 스타일을 위한 레이어입니다.utilities레이어는 다른 스타일보다 우선으로 하는 소규모 단일 목적 클래스를 위한 레이어입니다.
@layer 문을 사용하면 선언 순서를 제어하고 특정 클래스를 추가하여 사용할 수 있으며 빌드 시 크기를 줄이기 위해 선언되지 않은 유틸리티 클래스는 제거됩니다.
base layer
특정 요소에 대한 기본 스타일을 추가하려면 @layer 문을 사용하여 @tailwind base 레이어에 추가합니다.
@tailwind base;
@tailwind components;
@tailwind utilities;

@layer base {
  h1 {
    @apply text-red-950;
  }

  h2 {
    color: red;
  }
}@apply를 사용하면 테일윈드의 기존 유틸리티 클래스를 사용할 수 있습니다.
components layer
컴포넌트 레이어는 카드, 버튼과 같이 재사용성이 높은 유틸리티 클래스를 만들 때 사용합니다.
@tailwind base;
@tailwind components;
@tailwind utilities;

@layer components {
  .select2-dropdown {
    @apply rounded-b-lg shadow-md;
  }
  .select2-search {
    @apply rounded border border-gray-300;
  }
  .select2-results__group {
    @apply text-lg font-bold text-gray-900;
  }
  /* ... */
}
단순히 코드가 깨끗해 보이기 위해 컴포넌트를 사용해 추상화를 하게 되면 테일윈드의 장점을 잃게 되니 재사용이 가능한 경우에 사용을 권장한다고 공식 문서는 설명하고 있습니다.
utilities layer
유틸리티 레이어는 테일윈드가 제공하지 않은 유틸리티 클래스를 만들 때 사용합니다.
@tailwind base;
@tailwind components;
@tailwind utilities;

@layer utilities {
  .content-auto {
    content-visibility: auto;
  }
}
Preflight
테일윈드의 preflight는 브라우저(Chrome, Firefox, Safari)의 디자인 시스템을 일치 시키며 기본 스타일을 수정(margin, boder 제거 스타일 초기화 등)합니다. 이러한 코드는 base 레이어에 저장됩니다.
@tailwind base;
@tailwind components;
@tailwind utilities;